Thursday, 27 September 2012

Lime Meringue Cupcakes

You will remember just a few days ago I achieved my first miracle in baking (not the double-yolk egg) and managed to make my first ever batch of lime curd; well this evening I put the lime curd to the use for which I had intended and made accompanying vanilla sponges and Italian Meringue.

I used the recipe (almost to the letter, no, really I am serious this time) in Cupcakes from the Primrose Bakery:

110g unsalted butter (softened)
225g golden caster sugar
2 large eggs
150g self-raising flour
125g plain flour
120ml semi-skimmed milk (room temperature)
1 1/2 tsp vanilla extract
1/4 tsp of salt (my own addition)

Sift the two flours together with the salt and then pour the vanilla into the milk.

First of all I made the batter in the usual way, blending the butter and sugar together (this time I used a hand mixer from the very beginning to save my wrists).  Once it was all blended and smooth I added in the eggs one by one and mixed them in thoroughly.

The first egg being added
Once the eggs were both incorporated into the mixture I started to add in the sifted flour and the milk and vanilla mix 1/3 at a time until the batter was thick and well mixed.

The almost finished batter
This batter went a lot further than the Red Velvet and I was able to get 12 equal sized scoops into the tin.

In the tin ready for the oven
I placed them in a 160⁰C for exactly 25 minutes and then took them out of the oven and placed them on a rack to cool.

Warm out of the oven

While the cakes were cooling on the rack I made my second batch of Italian meringue of the week, using the following:

97g egg whites (room temperature)
63g water (yes, again I know this is a weird amount but it works)
250g granulated sugar

I melted the sugar and water together in a saucepan, and when the syrup reached 100⁰C I switched the stand mixer on high with the egg whites and whipped them until they were firm peaks.  Once the thermometer in the syrup showed it had reached 118⁰C I switched off the heat and started to slowly add teh bubbling mixture to the egg whites.  I have discovered that it is much more effective to mix the egg whites in a metal bowl which has been cleaned with fresh lemon juice rather than a plastic or glass bowl.  Having added in all the sugar syrup I added a few drops of liquid food colouring (in green because I wanted it to complement the lime curd and the theme of the bake sale is MacMillan a charity who uses green as their signature colour).  I carried on whipping the egg whites and sugar syrup until the sides of the bowl were cool to the touch.

Once they were completely cool I 'cored' each cake using an apple corer (incredibly useful if you want to put something in the cupcake once it's baked) and then filled them with the home-made lime curd.

Cored and filled with lime curd

Once I had filled each cupcake and placed the core back in the cake I spooned the Italian Meringue into a piping bag and then piped it onto the cakes.

The swirls looked good but of course I had to go a little bit OTT (as you will see) and piped on a few stars and things to fill every single inch of cupcake that I could, I then placed them under the grill to brown them just a little bit.

The finished article

Red Velvet Cake with Cream Cheese Frosting

These are not, by any means, the traditional red velvet cakes.  Admittedly this is mostly because I simply did not have any buttermilk and didn't fancy going to the only supermarket near me that sells it (in my defence it was raining rather hard), so I improvised.

Due to my (again) not paying complete attention to what I was doing I ended up using a recipe that I hadn't previously intended to (I had left the other recipe book in my bedroom on the floor after a bit of late night reading), so here is my completely fake recipe for red velvet cake (it was neither as moist nor as spongy as the original that's for certain).  The funny thing was that I didn't realise that I had used the recipe until I actually started to spoon it into the cases (and then only because I had to re-scoop it into the cases because there simply wasn't enough.  If you want to repeat my mistakes then below is the recipe I used:

125g unsalted butter (softened)
125g caster sugar
150g self-raising flour
2 large eggs
2tbsp cocoa powder (here I used Cadbury's Bourneville, but you can use whatever you like)
25g dark chocolate (melted)
1/4 tsp of food colouring (I use the gel but you can use a full teaspoon of the liquid)

I started off with the basic batter mix, beating the butter and caster sugar together until it was a smooth pale cream colour, by hand this took me about 10 minutes (later on I started to use the hand mixer because my wrists started to ache (did you know that baking can give you RSI?).

Butter and sugar (yum - lovely on a dry Weetabix)

One egg...then another

If it curdles...

Add a little of the flour

With a bit of elbow grease you can make it look like this

Once you have blended all of this together it's time to add the flour, I always sieve mine to ensure that there are no little bits in it (though to be honest these days it's normally packaged having been sifted a few times so this is just me being ultra-cautious).

Here is where the recipe deviates slightly from the one you expect.  Instead of just adding the pitiful amount of dark chocolate that the recipe calls for I melted the chocolate in two tbsp of semi-skimmed milk, this ensured that the batter maintained a good dropping consistency.  Once I had added the last of the chocolate I folded in some gel food colouring and managed to get it a beautiful reddish brown.

Before it's measured into the cupcake cases

In the red cases
I used my brand new ice cream scoop to ensure that the size of each cupcake was the same (though as mentioned above this was not as easy as it should have been due to the batter not going as far as I thought it would).
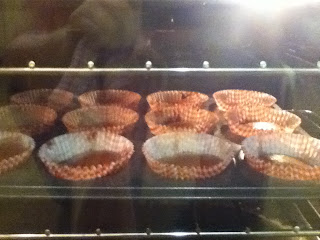
In the oven
 The cakes cracked a little on top when they rose (I think that this is because the batter was a little thick - next time I will use a bit more milk and see if this helps).  They baked in the centre of the oven at 160⁰C for 20 minutes until the skewer came out clean and the sponge sprang back quickly when pressed.  When I took them out of the oven I left them in the tin for 10 minutes and then transferred them onto a cooling rack until they were completely cold.
Fresh out of the oven
I normally would wait only until they were cold and then top them with cream cheese frosting but I didn't want to store the sponges in the fridge in case they didn't survive the night intact.  I made the frosting by combining the following in bowl and beating for 8 minutes with a hand mixer until it was a beautiful pink and the consistency of proper trifle custard:

125g unsalted butter (softened)
450g icing sugar
300g full-fat cream cheese
1/4tsp food colouring

I then stored the frosting in a piping bag in the fridge overnight (I didn't want to put the finishing touches on them until they were at work.

The finished cakes
Apparently they sold within 5 minutes of the sale opening when one person bought the entire dozen...

Wednesday, 26 September 2012

Lime Curd

Today and tomorrow I will be working on one project with many individual parts.  Today - before I go to the health conscious Zumba class that is my usual Wednesday routine - I thought I would start the project with the part of the bake which takes the least time and the fewest ingredients, but is the one thing I have never done before.  Today marks the first day I have ever made Lime Curd (or any type of curd for that matter).

Ingredients
225g caster sugar
150g butter (unsalted)
3 limes (juice and zest)
2 eggs (whole)
2 egg yolks (I lucked out here, I cracked open the first egg and it was a double yolker - talk about an egg saver)

Getting out the only pan with a heavy enough bottom that I can whisk in a double boiler over it I poured in enough water to heat it up and then put the large glass bowl (only one I have that is properly heat resistant) over it containing the sugar, butter and limes.

Melting the butter and incorporating the sugar
Once the sugar and butter had melted into the lime juice and zest (an incredible smell), and I had cleverly burned my fingers a couple of times holding onto the bowl (which quickly became boiling hot), I added the eggs (through a sieve).  After a while of whisking (I love this double balloon whisk) it turned a rather lurid yellow
After the eggs had been stirred in (and didn't curdle)
It took a long time, but after a while the mixture started to thicken.  Though most of the recipes say that you can leave the pan and stop stirring I was like a mother with a newborn, hovering over the mixture as it developed a bit of a froth and slowly (incredibly slowly, felt like forever) started to thicken like a custard.

The bubbling, frothing lime curd (not quite done yet)

Like with jam (or so I have been reassured) the mixture thickens more as it cools, but the true test that it is ready to remove from the heat and leave to its own devices is the moment when the curd can coat the back of a spoon and you can draw a stripe down it that doesn't immediately disappear

The spoon covered with evidence that I hadn't screwed up 


As you can see from the above picture, I actually managed to create the right consistency, with any luck it will thicken enough that when I spoon it into the plain vanilla cupcakes I will make tonight when I get back from Zumba it won't soak right through them and leave me with a soggy mess in a cupcake case.  Time, and the next installment of 'baking for MacMillans' will tell.

Sunday, 23 September 2012

Macarons

Well, what can I say about my experiment with Macarons apart from "nice try, better luck next time".  I started off by choosing to make the Italian Meringue; all the research I have done over the last few weeks states that though they are slightly more time consuming to make they are more stable than their French counterparts, so this morning I went about separating exactly 194g of egg whites and putting them in a bowl in order to bring them up to room temperature.

Ingredients (I did use the method which apparently can be tracked back to Pierre Herme)

For the Meringue
97g egg whites (next time I will age them for 24hrs too)
250g granulated sugar
63g of water (yes, it is an odd amount but it works)

I used a sugar thermometer to ensure that the sugar syrup did not go above 118⁰C and at the point that it reached 100⁰C I started to beat the egg whites until they frothed

Bubbling sugar syrup
I added the syrup to the frothed egg whites (they were standing up on their own and well on the way to being a good meringue).
Finished Italian Meringue
The meringue, when finished, had a small 'eagle's peak', I think that perhaps the meringue had been slightly over-whipped before I added the sugar syrup which led to a much looser finished product than I would have liked.
Once I had finished the mixing of the meringue I finished off the macaron mix, which is made mixing the following together:
97g egg white (again this should be aged)
250g ground almonds (sieved)
250g icing sugar (sieved)
Once I had mixed these together until they made a thick almost gummy paste  I started to stir in the meringue mixture.
Meringue being mixed into the almond and sugar batter
Once this was all incorporated and the mixture was almost falling smoothly off the spoon I separated it into two bowls so that I could do two different colours.  
Earlier (while I was waiting for the egg whites to come up to room temperature I drew around a shot glass using a black marker pen 15 times on three sheets of non-stick paper.  I used the template to pipe the batter onto the trays which I then left for 30 minutes on the side so that they could grow a 'skin'.
30 minutes isn't that long, right?
While they were settling on the trays I turned the oven on and set it to 140⁰C, by the time the macarons had been sitting out on the side for 30 minutes the oven had reached the right temperature (or what I assumed was the right temperature - think I will be investing in an oven thermometer this week).

In the oven - they even started to develop those little 'feet'
I looked at them in the oven after about five minutes and could see that they had started to develop those beautiful little bubble feet, they were straight, the tops were smooth and they looked great.  Then disaster...
Cracked, distorted and chewy!
I can only assume that a) they cooked too quickly on the top and the oven was at the wrong temperature. They taste fine though they are considerably more chewy than I would like.  I am going to follow the rest of the instructions though and leave them in an air-tight container for at least 24 hours before I put the filling inside them (I am thinking that I will use a chantilly cream stirred through with dried fruit of some kind).
Though these are not the stunning initial foray, at least I know that the Italian Meringue method does produce good results, now it's all down to the oven temperature and getting a better quality of tray to bake them on (it's possible another of the issues that I had with these is connected solely to the tray being a little bit thin and bending when exposed to a little bit too much heat).
I live and learn, next time these will be much better.  Guess that the baking for the sale this coming Friday will be cupcakes - wonder what recipe I will try :)

Friday, 21 September 2012

Peanut Butter Cupcakes

I wouldn't have thought of doing this had I not had a glut of peanut butter and a desperate need to bake something.  So, yesterday afternoon I set about using my new baking book Cupcakes from the Primrose Bakery and, having looked up the recipe for peanut butter cupcakes - my idea being that I should make something which resembled one of my favourite chocolate bars (Snickers) - I set about making it.  Now, this recipe is very easy:

130g smooth peanut butter
75g unsalted butter
190g soft dark brown sugar
2 large eggs
120g plain flour
1tsp baking powder
60ml semi-skimmed milk
Pinch of salt
1tps vanilla extract

Me being me I got incredibly confident.  I followed the recipe to the letter, mixing the peanut butter, butter and sugar until it was smooth and light

Before it's mixed up

After ingredients are creamed together

Once this was done I started to add the other ingredients; the eggs, the flour, the baking powder, it made a smooth and incredibly beautiful glossy batter which fell off the spoon nicely.

Beautiful - well, I think so anyway
It was at this point that my super-stupid confidence kicked in and I did something idiotic.  As you can see from the ingredient list at the beginning there is mention of milk; well, me being me, I didn't add it.  To my eyes the batter looked perfect - even more so after I had added 40g of dark chocolate chips tossed in flour into the batter - so I didn't see the need to add the milk.  Having coated the bottom of each cupcake case with a cookie crumble (made simply by crushing some chocolate chip cookies with a rolling pin - 6 provided enough crumb for the 12 cases though next time I think that I should not crush it quite so finely and perhaps use more) I simply spooned the batter into the cases and put them in the oven (fan assisted pre-heated to 160).

Before they went in the oven
I can't help thinking that perhaps the milk was a necessary ingredient if only because they took much longer than the recommended 20 minutes in the oven, though they rose incredibly well.


After 8 minutes in the oven

After 15 minutes in the oven

After 30 minutes in the oven - 10 minutes over the recommended time
After 10 extra minutes the tester came out clean and the cakes sprang up immediately when tested with my finger.

I removed the cakes from the tin after 10 minutes out of the oven and left them to cool on a tray.  It is at this point I realised that the milk was an ingredient I will not forget next time.  The top of each cake was much firmer than I would have liked, almost as though it had formed a rather solid crust which made the cake more crumbly than airy and soft.

Once the cakes were cooled enough I decided to make a chocolate frosting.  I love sweet foods but I have always found frosting is far too sweet and on top of a cake that is already sweet it's too much.  I made ganache the normal way:

30g unsalted butter
90ml of cream (I used Elmlea - yes, sort of like locking the stable door after the horse has bolted but I don't have cream in my fridge)
300g dark chocolate chips

Once I had melted the chocolate chips in the warmed cream and butter I then set about making it less sickly sweet.  I added the following, 300g full fat cream cheese (beaten into the warm mixture it was quickly smooth) and 1 tbsp of smooth peanut butter.

The chocolate and cream cheese frosting
I also made a caramel using 135ml of water and 250g golden caster sugar and a 1/4tsp of salt (sweet on top of sweet on top of sweet is too much for this girl).

It took me 10 minutes to frost the cupcakes, drizzle some caramel on top and then sprinkle with a few grains of rock salt...

The best of the bunch
They were much more close-crumb than I would have liked, needed more cookie on the bottom and the frosting was much more than was really necessary.  All in all not a bad effort, but next time I will not forget the milk!

Wednesday, 19 September 2012

Clementine Cake

A friend of mine asked me to make something without flour this weekend, so I resorted to an old faithful that has only ever gone wrong once in all the times I have baked it.  I was sure that it would be in my Nigella's Domestic Goddess recipe book, but it wasn't so I had to go on the search again (I lost my original baking bible - a small notebook that I had put together containing all my favourite recipes in the house move two years ago and never bothered to replace it).  I found the recipe for the cake here and though I do say so myself it turned out wonderfully.

I followed the recipe to the letter, I soaked the clementines for 2 hours in gently simmering water and then I made use of my Kenwood to blend the clementines to a pulp (pith, skin and everything but the pips).  While the clementine liquid was still rather warm (this could have been disastrous but for sheer luck I feel) I added it to the eggs, ground almonds and sugar and then very quickly poured it into two greased and lined tins and then right into the oven on two trays close together and close to the top.

In the oven rising like a champion
 
As I used two smaller tins rather than the large springform that is recommended (I did this for a reason) I found that it took 40 minutes rather than the whole 60 and the cake was moist, dense and wonderful. I did cover it with crumpled greaseproof paper for the last 10 minutes but as you can see it did colour slightly more on the top than perhaps it should.  To get a less 'done' appearance I will definitely put the greaseproof on the top for the last half of the cooking time and then it will hopefully retain the wonderful orange-y colour that it should have.

The finished article

 I served it as slender slices - being a rather dense moist cake a little goes a very long way - with quenelles of delicately vanilla-scented Chantilly cream.  I think that perhaps the season for Clementines is not quite right yet, the cake was very lightly flavoured and I would have preferred it to be a little bit less sweet and slightly more sharp.

The Perfect Plate!

Monday, 17 September 2012

An Update or I Begin Again

Though it has been a while since I have actually posted anything on the site this does not mean that I have been completely inactive with regards the baking.

In order I have baked the following:

Coffee and walnut cake:  Another Mary Berry recipe which, though I didn't eat this (sometimes we bake things we really don't like to eat, right?) went down really well at the bake sale I made it for:

Coffee and Walnut cake with Coffee Icing (yes my fridge is a mess)

Devonshire Apple Cake: I made this for the same bake sale, unfortunately looks can be incredibly deceiving; it looks lovely, right?  Unfortunately I took it out of the oven about 10 minutes too soon and by the next morning the whole thing had collapsed.  Though it was a failure it still looked really good (until it sank). I used Mary Berry's recipe but I think the next time I make it I will up the temperature of the oven by 10 degrees and leave it in 5 minutes longer.

  
Looks gorgeous, right?  But for a few minutes cooking time it would have been perfect

I have also attempted a batch of macarons (next time I am going to be using the Italian Meringue base rather than the French - it's so much more stable.

Roll on the cooking again, it's been so long but I haven't been completely lazy...let the practice recommence.

Sunday, 12 February 2012

Lemon Drizzle Traybake

This week marks the second week of my diet (15lbs lost in a fortnight), but that doesn't mean the baking is stopping, in fact we have a bake sale at work this week in aid of a good cause so again I turned to my copy of the reliable Mary Berry's Baking Bible and checked out the traybake recipes, figuring that this would be the best way to go; the recipe doesn't produce any 'overs' so there is nothing I can be tempted (well, there is, but there is only just enough to sell for charity rather than stuff in my mouth).  Normally I would select a cupcake recipe, or a large layer cake, but I decided that this was the right way to go, and you can never go wrong with "Lemon Drizzle Traybake" or Lemon Drizzle in any format whatsoever.

The recipe was incredibly simple, granted I could have embellished it with lemon curd or something, but I chose to follow the recipe to the letter (this did admittedly prove difficult when I realised that I had absolutely no granulated sugar for the crusty topping though).

The whole thing took 25 minutes to mix together - including weighing everything out and mixing it in my trusty Mason Cash bowl (I will never regret spending the extra cash on that, it's massive and perfect for mixing all my recipes).


It started to rise the moment it was put in the oven (thank you recommended 2tsp of baking powder).


By the time it had been in the oven for just 20 minutes it was a lovely golden brown colour on the top and had started to come away from the sides.


Given the below freezing temperatures outside it took very little time to cool enough that I could put it on a cooling rack over a tray (which I lined with silver foil) and poured on what looked like an absolutely huge amount of lemon syrup (lemon juice, caster and demerara sugar - this should have been granulated but having gone on diet this was one thing I knew I would never be able to resist in my tea should I still have it in the house).  The cake now needs to stand until it is absolutely cold, then it will go in an air tight container until Tuesday (bake sale day).

Sunday, 5 February 2012

Fork Biscuits

Today I tried my hand at "Fork Biscuits".  This is the first biscuit recipe in Mary Berry's Baking Bible and she says that it is one that is one she has had for a long time in her repertoire.

Though I started a starch, sugar and fruit free diet last week (and have so far lost 9lb - thank you South Beach) this is not going to stop me in my endeavour to improve my baking skills before I attempt an entry in the 2013 Great British Bake Off.  Work is hopefully going to be appreciative.

The recipe for the "Fork Biscuits" is pretty straight forward, sugar, self raising flour and butter (though I have added in a dessert spoon of good vanilla) and they look very similar in appearance to the "Lime Lattice Cookies" that I baked a few weeks ago.  I just have to hope I have the strength to resist eating even one single bite of one of them.


They don't look like much at all, but they smell really good and if the mix (which I resisted adding water to when it didn't bind as well as I wanted it to) which is very light and crumbly, is anything to go by then they will be light and crumbly when baked.

They don't take much time at all to cook - just a matter of 10-12 minutes to turn a light golden brown in a fan assisted oven, then they just have to cool on a cooling tray and they can be packed in a biscuit tin.  This time tomorrow they should all be gone and I will have hopefully resisted eating a single bite of one of them.


Sunday, 22 January 2012

Lime Lattice Cookies

Another recipe from Mary Berry's Baking Bible this time it's "Lime Lattice Cookies" and to all intent and purpose it looks like it's going to be another delicate biscuit/cookie.  I am not doubling up on this recipe.


So this is what the mixture looks like!  A very simple mixture of sugar, butter, flour and lime zest.  When I brought it together I admit I did deviate from the recipe a little bit - the whole thing just wasn't binding together so I added a dessert spoon of tepid water and that seemed to bring it together enough that I could handle it without it crumbling.


I made 16 equal sized balls of dough (and one very small ball that I ate as a taster when it was baked).  Though the recipe instructed use of a skewer to make the lattice pattern the skewer I used was too thick so I ended up using the very end of a clean chopstick - that seemed to work to my satisfaction.


They didn't spread in the oven (but then they don't contain any egg).  After just 12 minutes they started to turn a pale golden colour and the kitchen started to smell of lime zest (very refreshing).  After 15 minutes I took them out of the oven and put them on a tray to cool, they were very soft, delicate and crumbly.


The finished article.  They are melt-in-the-mouth soft and have more of a scent of lime than a taste.  Hopefully they will like them at work.